What is it?
TILT!Audio is a free time project that aims to get you a replacement for your audio board in your pinball game. It works with data east, wpc and white star games.
What do I need?
You need a board (PCB) and a couple of electronic components (SMD chips, resistors and some pre assembled modules), a raspberry pi (3B or newer recommended, but 3A and even Zero 2 works) and a micro sd card for the software and the new sounds to use. Maybe some additional wires as you are going to get stereo sound on old wpc machines.
The PCB designs are free and you can create one or order one on your own if you like. Just checkout out https://oshwlab.com/steve45/tiltaudio. Alternatively you can order a kit including all required components and a PCB in my shop.
Finally to run the software without licensing hints for more than just 10 minutes you need a license (also available in my shop).
Can I do it on my own?
Some soldering skills are required. Some basic understanding of your pinball electronics (it is not plug and play). Some computer knowledge on how to flash a micro sd card with an “image” and maybe extracting a zip file.
Step by Step
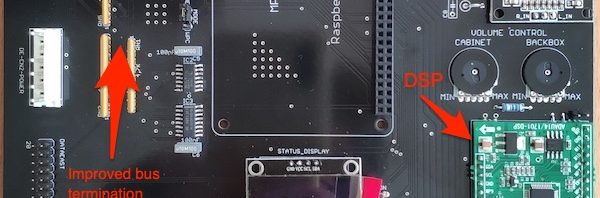
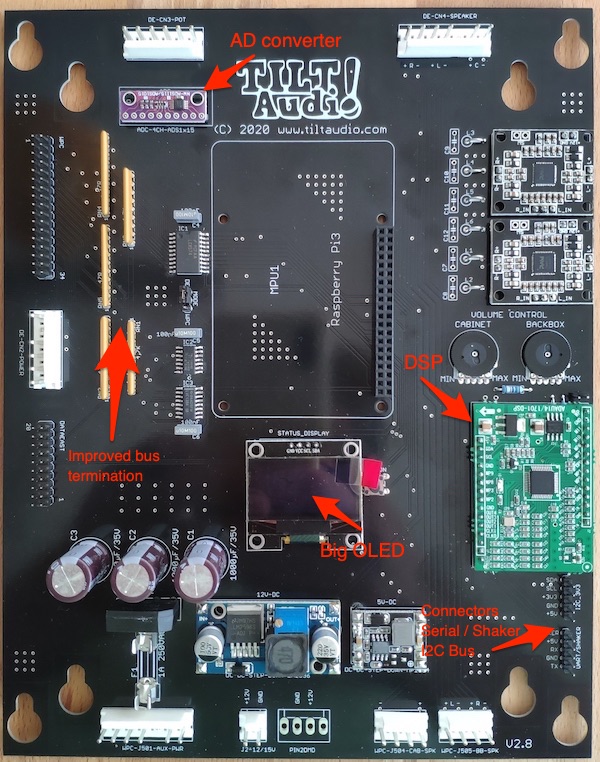
- Assembly: First you need o assemble the board, there are a couple of hints and also a video available on the assembly page on this website. As there were already many board revision, be sure that you only look for your board revision not older outdated ones.
- Prepare the micro SD Card for the pi: get a 16GB micro sd card a flash the latest image onto the card using a tool like balena etcher. Add a sound pack for your machine into the data/sound directory on the sd card. Sound packs are available from the virtual pinball community on http://altsound.vpin24.com. Just look for your machines rom abbreviation (see on https://www.ipdb.org/).
- Optional for sd card: add an update.zip to the sd card update if there is a patch update newer that the latest image available. Latest versions see below.
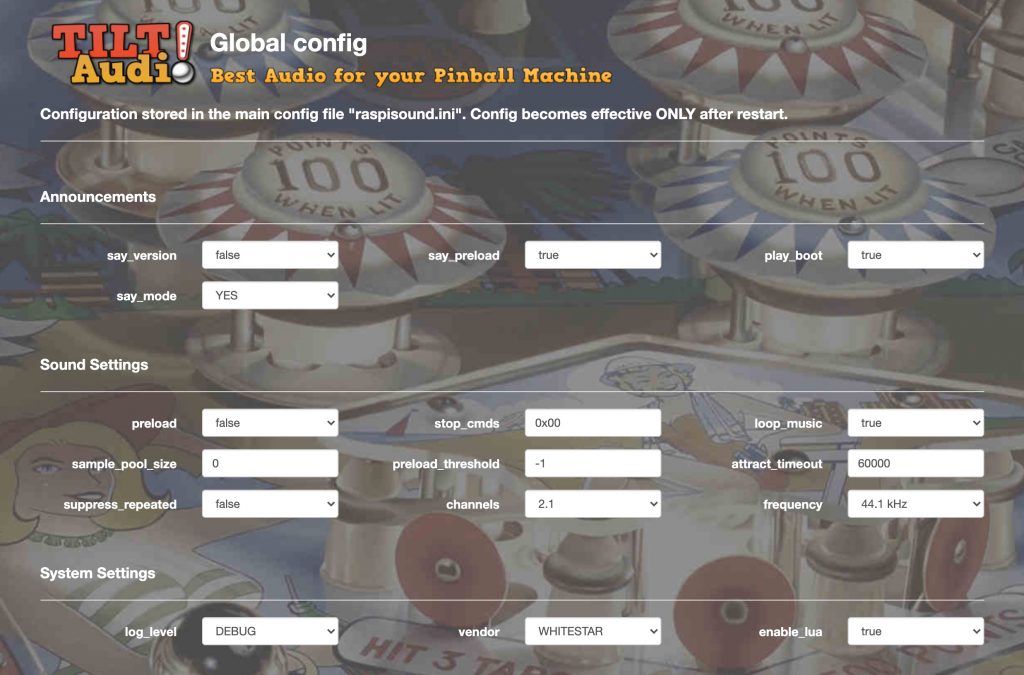
- Check the initial setting for your machine: (only for board rev < 3.5, newer boards can skip this step): there is a jumper on the board that needs to be set to DE if your machine is data east or white star and to WPC for all wpc machines. Open the raspisound.ini file in the data/sound diectory and add one line with “vendor=0” for data east, “vendor=1” for WPC, “vendor=5” for WPC DCS and “vendor=7” for white star.
- Prepare speaker wiring: for old wpc machines you need to change the speaker wiring, as you will get stereo in the backbox plus mono in the cabinet (2.1 sound). see here. Lookup out for the speaker connectors on the bottom of the board and change your speaker wiring accordingly. You could also think of replacing the original speakers with better replacement ones to get even better sound (and you really should!!)
- Turn down the volume: before putting the board in and start up the pinball turn down the volume to almost minimal by turning to two onboard pots to the left (CCW) and then slightly back to right some degrees.
- Apply the raspberry pi: put the micro sd card into the pi and then put the pi upside down onto the board.
- Replace the sound board: pull out the old sound board from the pinball machine and replace it with the new TILT!Audio board. Note: not all the former connections are needed / are the same. For WPC the speaker wiring is changed (see 5) also the logic power connector (on the left) is not needed only the aux power J501 at the bottom.
- Switch on the pinball machine: for WPC boards you should see the DC power module led and in any case the led on the DAC module light up. If you installed an OLED status display shortly after boot the TILT!Audio logo should appear. After 20 seconds you should hear a boot sound.
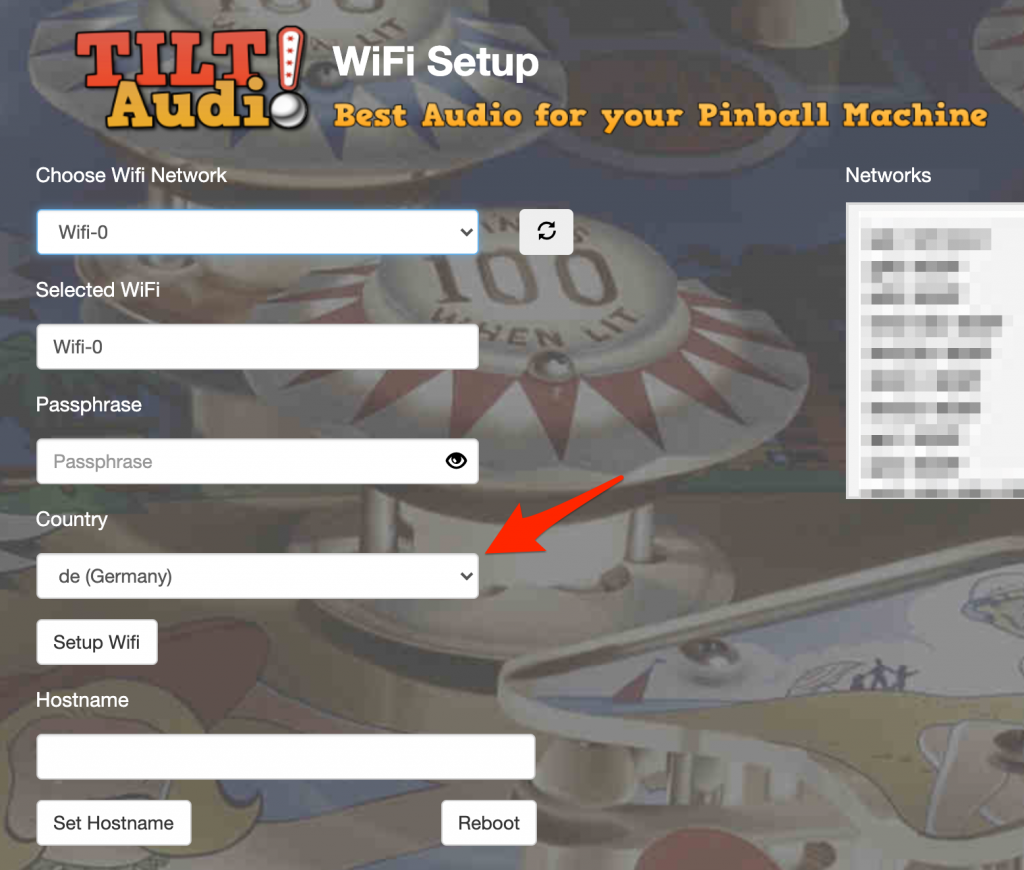
- Configure via Wifi (optional): if your pi has wifi (normally always the case) after a few minutes you should see a new wifi network “TILTAUDIO”. You can connect your computer or smart phone using the password “tiltaudio” and then connect to http://192.168.42.1:31008/ to get to the webUI. This is only necessary if you some of the initial setup steps above did not match your machine setting or for more expert configurations. if you have the right vendor setting applied and a sound pack installed you should already be able to play your first game with new sound experience.
Latest image version is 1.38 can be downloaded here: https://tiltaudio.com/file/firmware-latest
Ask me for the new beta version.
Latest update patch (see changelog) can be found here: https://tiltaudio.com/file/update-latest please be sure to rename the zip file to update.zip before copying to the update folder onto the sd card.
Troubleshooting
I can’t hear any sound, not even boot chime.
Check speaker connection wires. Check on board pots if volume is not completely down to zero (all to the left).
If you have access to web UI goto audio device settings and try a different audio device.
I can’t hear only boot sound, but game does not start playing music or react to game play
Check if jumper setting matches your game type (see 4 above). Also check the vendor setting in the raspisound.ini file. If you have access to the web UI you can also check vendor settings on the config page.
Also check the connection of the data cable (ribbon cable).
Raspberry pi does not boot and no led is lighting up on the DAC module.
Check power supplies: on wpc check fuse. (older boards also data east). Check correct connection of power supply connectors J501 for WPC and CN2 for data east.
Data east cabinet pot for volume control does not work
Check CN3 connector to cabinet pot (top side of the board). for newer boards: is the ADC module applied? for older boards: enable_dataest_volume set to true?
I hear sound triggered in the web ui, but not in the game.
Check data connections and the jumper must be set accordingly (DE or WPC)
Please also check the FAQ.